Ansible Automation Platform (AAP) Integration#
Vault Setup#
Vault Policies#
Teams are responsible for setting up policies to give Ansible access to specific secrets or paths. Use this terraform or the following CLI commands to setup a role to read any secrets at secret/aap/*. For more information, see this article on Vault AppRoles. Depending on which option you use, there are two different paths that will be needed.
This is an example of a Policy that has already been created in each Team's Vault Namespace
vault policy write awx_user_ssh_keys - <<EOF
# Required path for community.hashi_vault.hashi_vault & AAP HashiCorp Vault Secret Lookup
path "secret/data/aap/*" {
  capabilities = ["read"]
}

# Required path for community.hashi_vault.vault_kv2_get lookup
path "secret/aap/*" {
  capabilities = ["read"]
}

# Required for SSH Key Signing. See https://github.com/umn-devex-community/awx-user-ssh-keys for more info
path "secret/data/aap/awx_user_ssh_keys" {
  capabilities = ["create", "read", "update", "list"]
}

path "ssh-client-signer/sign/awx-user-role" {
  capabilities = ["create", "update"]
}
EOF
Approle#
An Approle is an identity in Vault used for automated tasks.
To create an approle, run this terraform or use the following CLI command and associate the policy that you created in the last step:
The following will create an approle and bind 2 policies to it that will limit its scope of access.
vault write auth/approle/role/ansible \
  token_policies="default,awx_user_ssh_keys" secret_id_ttl="365d" token_bound_cidrs="10.67.91.0/26" secret_id_bound_cidrs="10.67.91.0/26"
role_id & secret_id#
Ansible will use a role_id & secret_id to authenticate to vault. The example terraform will automatically display the role_id, and you can run terraform output secret_id to obtain the secret_id. For production, the following CLI commands should likely be used instead so the secret_id is not stored to the terraform state.
# Read role-id
vault read auth/approle/role/ansible/role-id
# Create a secret-id
vault write -f auth/approle/role/ansible/secret-id
[!IMPORTANT]
Remember to rotate your approle's secret id and update the credentials in AAP every year to prevent them from expiring and interrupting your automation.
AAP Setup#
Use both of these Credential types to integrate with AAP
HashiCorp Vault Secret Lookup#
Use this Credential Type when you need AAP to access Vault and configure other Credentials in AAP. ie Machine Credentials, Source Credentials.
Setting up the HashiCorp Vault Secret Lookup Credential
-
Navigate to Automation Execution>Infrastructure>Credentials: Create Credential
-
Fill out the following information (all other fields can be left blank):
- Name i.e. (CESI_ORG)_hcp_lookup
- Description i.e. Approle for AAP plugin to connect to Vault
- Organization Your team's AAP organization
- Credential Type HashiCorp Vault Secret Lookup
- Server URL https://hcp-vault-private-vault-fc507e0d.5d5b1f21.z1.hashicorp.cloud:8200
- AppRole role_id role_id retrieved from vault when creating approle
- AppRole secret_id secret_id retrieved from vault when creating secret_id for the approle
- Namespace name
admin/<CESI>oradmin/<CESI>/<subteam>(i.e.admin/devexoradmin/iam/appsec) -
Path to Auth approle
Note
You will need to manually put
approlein here. It will show up as approle in grayed text by by default, but it won't work unless you type it in. -
API Version v2
-
Save the credential (sometimes testing won't work unless you save it first)
-
Re-edit the credential and click the Test button to test the credential

-
You can now use this plugin to retrieve secrets values for other credential types by selecting the key icon next to a field when creating or editing a credential.
UMN HCP Vault#
Use this a custom Credential Type created by Devex to pass Vault connection information into a playbook so that when the playbook runs it can retrieve secrets from Vault.
-
Navigate to Automation Execution>Infrastructure>Credentials: Create Credential
-
Fill out the following information:
- Name i.e. (CESI_ORG)_hcp_credential
- Description i.e. AppRole for Ansible to connect to Vault
- Organization Your team's AAP organization
- Credential Type UMN HCP Vault
- ansible_hashi_vault_role_id role_id retrieved from vault in previous section
- ansible_hashi_vault_secret_id secret_id retrieved from vault in previous section
- ansible_hashi_vault_namespace admin/CESI or admin/CESI/subteam (i.e.
admin/devexoradmin/iam/appsec)

-
Associate that newly created credential to your Job template

-
Select the
devex-eeExecution Environment for your template (it has thecommunity.hashi_vaultcollection and other prerequisites)
Example: Using UMN HCP Vault Credential with Ansible in a Playbook#
The official ansible collection is community.hashi_vault.
The best way to use secrets in an Ansible Playbook is by passing in the UMN HCP Vault Credential to the Job Template and adding tasks to ansible to fetch the secrets. The Following example uses the ansible plugin (community.hashi_vault.hashi_vault lookup) (yes it has lookup in the name but it is NOT related to HashiCorp Vault Secret Lookup). These don't need to be runs as pre_tasks: for simple playbooks but do for more complex ones.
---
- name: HCP Vault Lookup Integration Examples
  hosts: localhost
  tasks:
  ## Devex recommends creating a test secret in vault with test data to avoid displaying real data/secrets

  # Option 1: Gets a single secret value with hashi_vault
    - name: Lookup with hashi_vault
      ansible.builtin.set_fact:
        secret_1: "{{ lookup('community.hashi_vault.hashi_vault', 'secret=secret/data/aap/test:subkey_A') }}"
      no_log: true

    - name: Display the secret with hashi_vault
      ansible.builtin.debug:
        msg: "{{ secret_1 }}"

  # Option 2: Gets all subkeys within a secret with hashi_vault
    - name: Return secrets as a dict (default)
      ansible.builtin.set_fact:
        secret_2: "{{ lookup('community.hashi_vault.hashi_vault', 'secret/data/aap/funtest') }}"
      no_log: true

    - name: Show one specific subkey from a secret
      ansible.builtin.debug:
        msg: "{{ secret_2['subkey_B'] }}"

    - name: Loop through all subkeys within a secret
      ansible.builtin.debug:
        msg: "Secret '{{ item.key }}' has value '{{ item.value }}'"
      loop: "{{ secret_2 | dict2items }}"

  # Option 3: Gets a secret value with vault_kv2_get
    - name: Lookup with vault_kv2_get
      ansible.builtin.set_fact:
        secret_3: "{{ lookup('community.hashi_vault.vault_kv2_get', 'aap/test') }}"
      no_log: true

    - name: Display the secret with vault_kv2_get
      ansible.builtin.debug:
        msg: "{{ secret_3.secret.subkey_C }}"
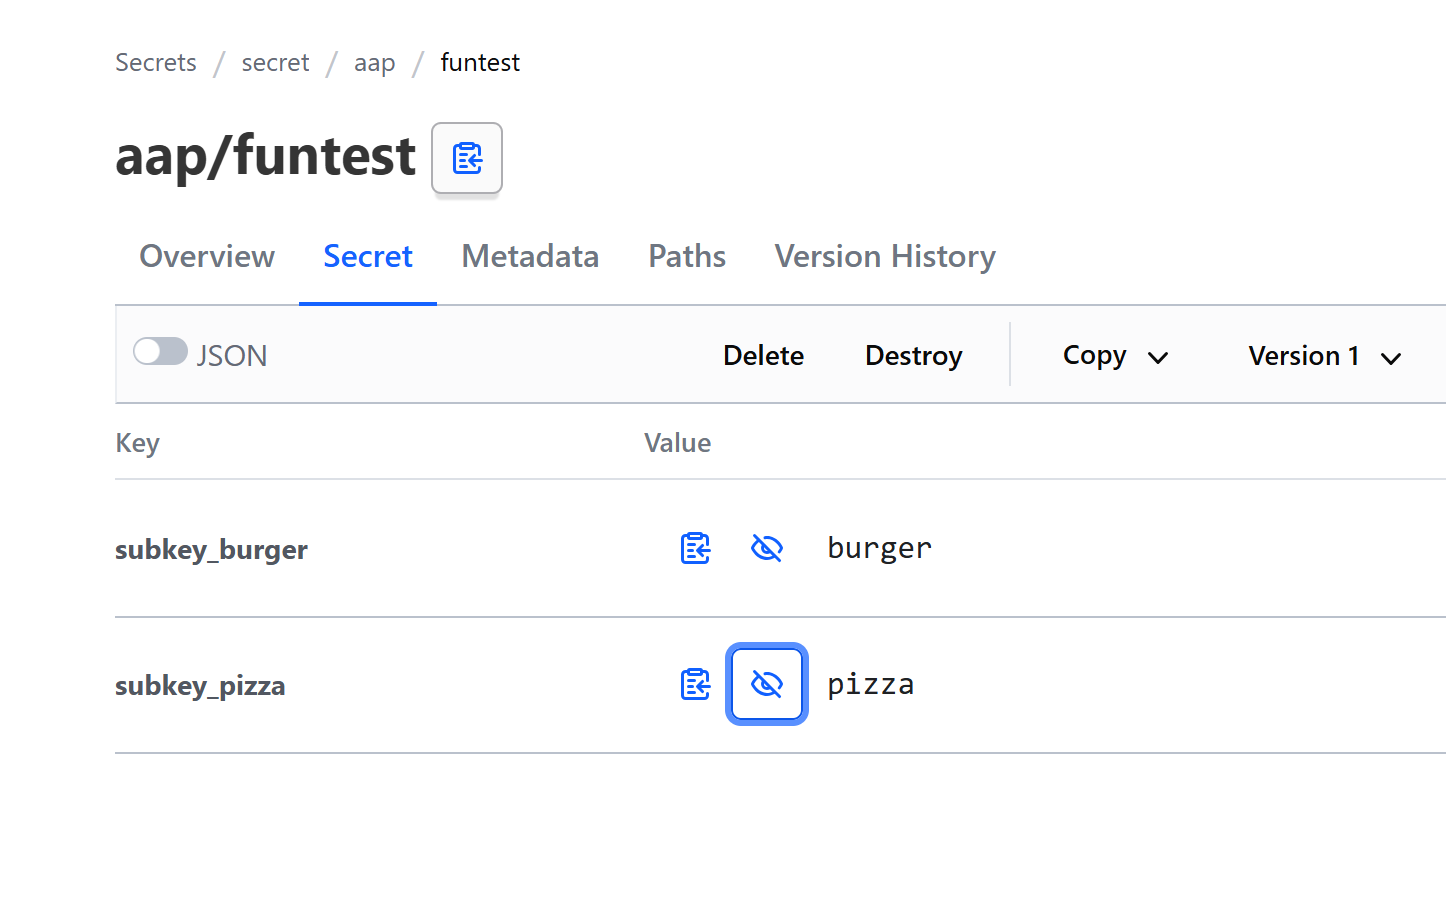
Here is what the secret funtest looks like.
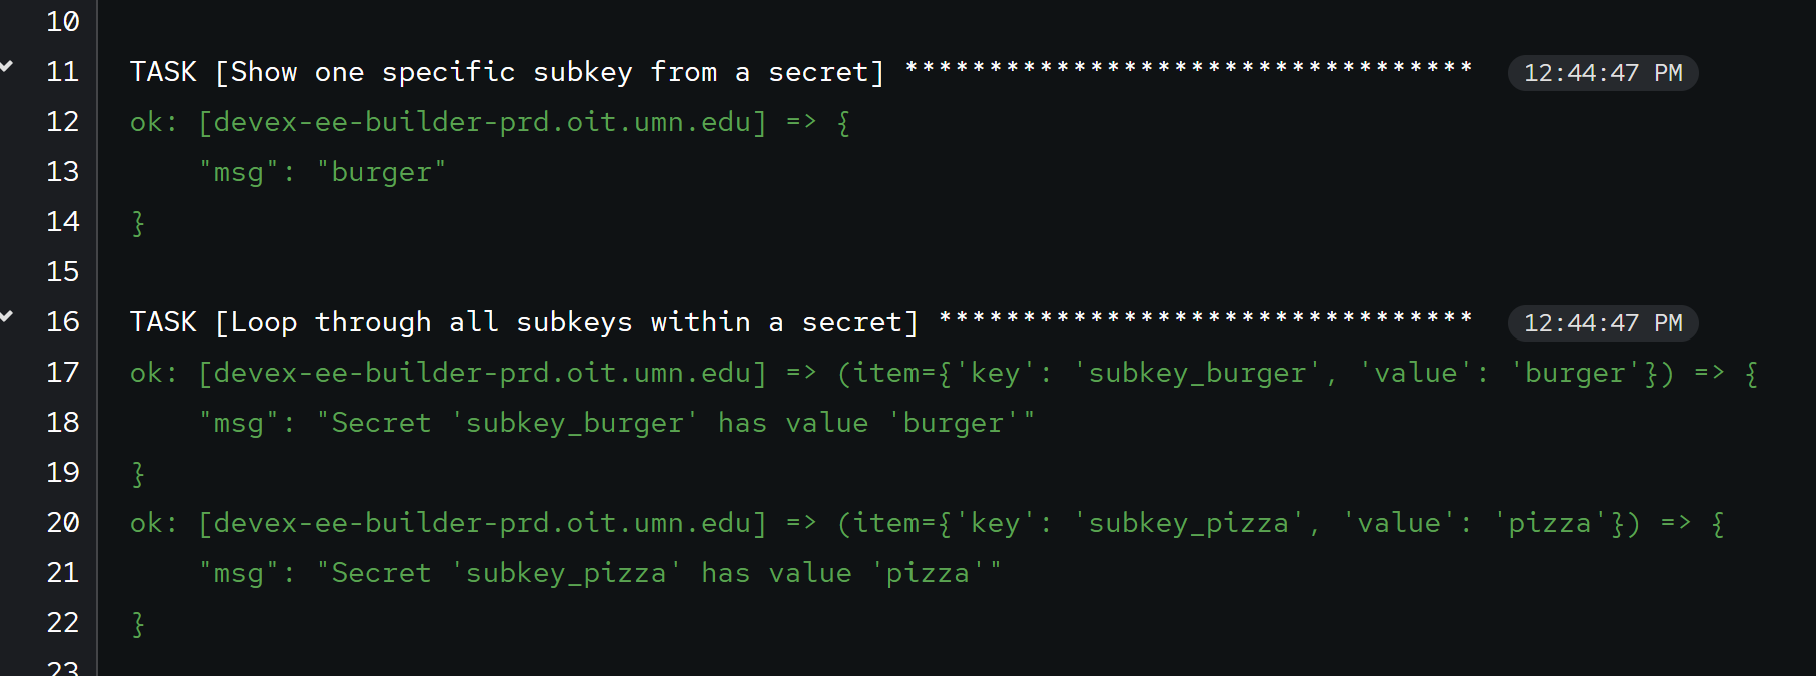
Here is what the Job output looks like
See this example playbook for details on how to use the community.hashi_vault ansible collection.
Note
To run locally with user permissions, see this article